Step 1
So, how do we transform a normal horse into a water horse? Well,
first let’s open the image “Horse”. It is a very nice photo, full of
dynamism and movement, almost begging for a cool photo manipulation. If
you followed my previous tutorials on photoshoptutorials.ws you probably
know how to make a fire horse and an ice horse so this should give yet another horse transformation solution.

Step 2
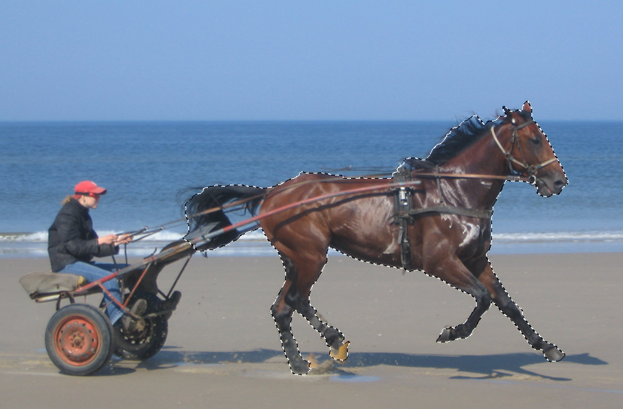
The first thing we should do it is to get rid of the horse and
replace him with the background. Use the Lasso Tool (L) or the Quick
Selection Tool to make a rough selection of the horse.
Step 3
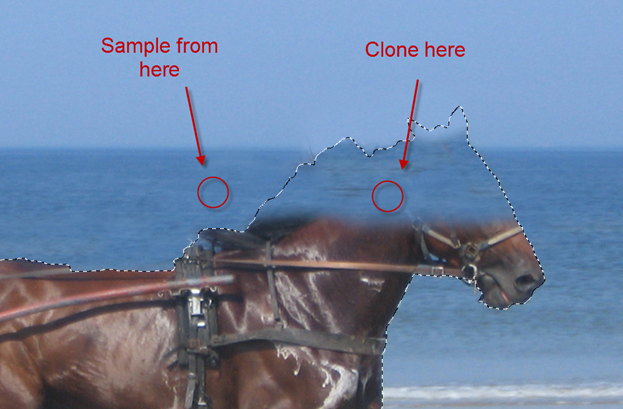
Now that we have a selection let’s select the Clone Stamp tool and
start cloning from outside the selection and painting inside. Try to
keep the sampling and cloning on the same line (don’t sample from the
sky and clone way down where the sea should be). You can see in the
image below that I replaced the head of the horse with the sea and the
sky. To sample with the Clone Stamp tool Alt-click on the desired
location.
Step 4
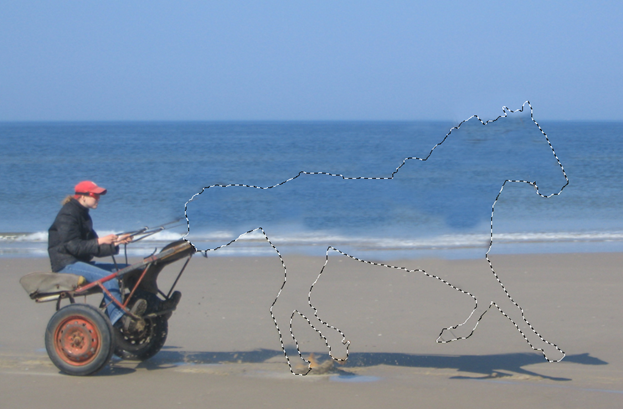
In the image below notice how I finished cloning and sampling the
horse. The results are not perfect but I decided not to invest too much
time because this area will be partially visible anyway. Now it is a
good time to save the selection of the horse because we will make good
use of it in a next step. To save a selection choose Select > Save
Selection and write a name.
Step 5
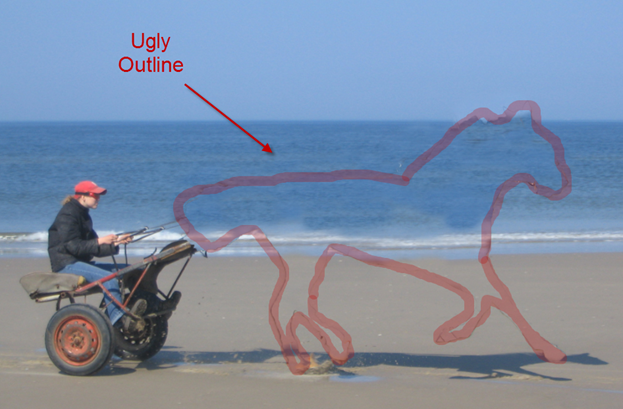
Press Ctrl + D to deselect. Notice that we have a dark, ugly line
contouring the horse. Get rid of it by selecting the Clone Stamp tool
again and carefully sample and clone. Take it slow, don’t hurry and if
you made a mistake it is better to go a step back (Ctrl + Z or Ctrl +
Alt + Z for multiple steps) then try and work over it.
Step 6
Remember that I told you to save the selection of the horse in step
4? Now it’s time to use it. Load the selection by choosing Select >
Load Selection and from the drop down menu select the name you used to
save it in step 4.
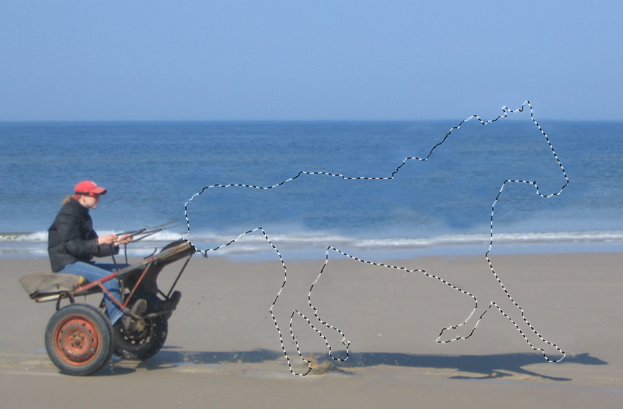
Step 7
Create a new layer by pressing Ctrl + Shift + Alt + N and press Alt +
Backspace to fill the selection with the foreground color. It doesn’t
really matter what color it is.
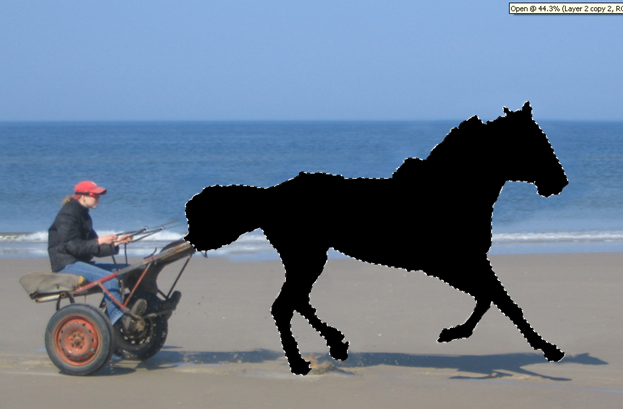
Step 8.
Name the layer you created on the previous step “Horse Glue” (sounds
strange but this will be the layer that will glue together all the
splashes of water and make it feel like a real horse and not just some
random drops of water) or any other name and double click on it to enter
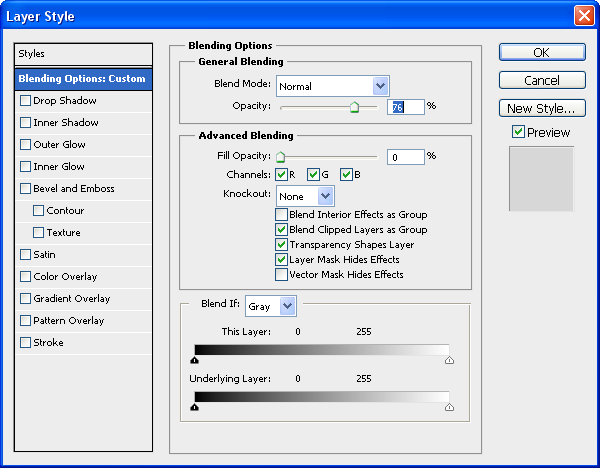
the Advanced Blending Options screen. Here I want you to drop the Fill
to 0% and the Opacity to 75%. In case you didn’t know Fill controls the
opacity of the layer itself while Opacity controls the opacity of the
layer and of the layer effects together. So if you lower the Fill to 0%
the color that you used to fill the horse selection with and that
represents the pixels of the layer will be rendered invisible but the
future layer effects will be fully visible. Cool, huh?
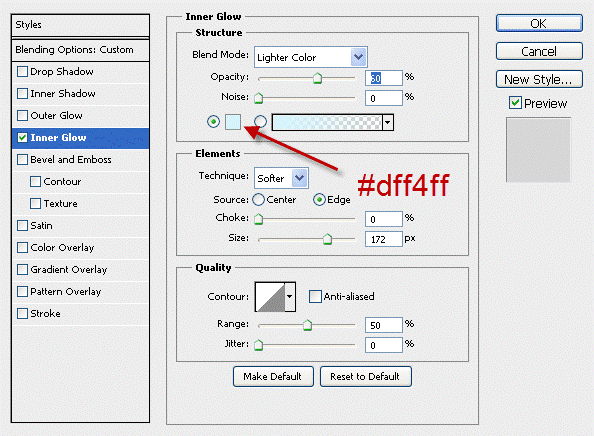
Step 9
Now check the Inner Glow box and use the settings you see below.
Noticed that I chose a light cyan-blue color that will best suit our
water horse. Once you are done press Ok.
Step 10
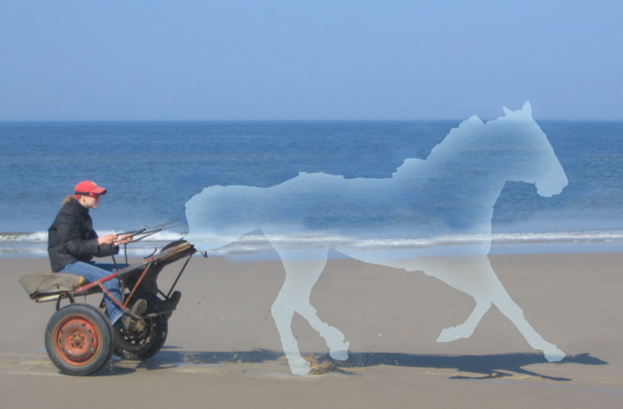
You can see below that now we have a foundation on which we will
build our water structure. In the next step I will explain you haw to
select drops of water and we will start building the water horse.
Step 11
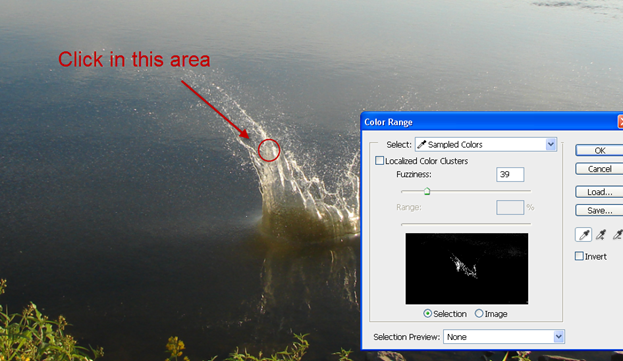
Open file “Splash2” and choose Select > Color Range. Click once in
the area pointed below until the preview in your little screen on the
Color Range window looks like mine below. Basically we are trying to
select as much as possible of the white water splash without selecting
other stuff. The preview in the little screen shows us what selection we
have made by using the same principle as a layer mask: white reveals
and black conceals. So everything white will be selected and black will
not be selected. Gray means that the selection will be partial. The
Color Range works by selecting pixels based on the place you click. So
if you clicked in the area shown below it will try to select only the
white splash without the green water surface or the plants. Don’t be
afraid to click multiple times until you obtain the desired effect. Once
you’re done click Ok and you will have a selection.
Step 12
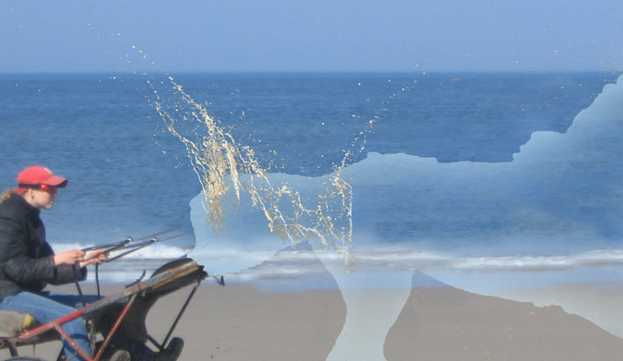
Press Ctrl + C to copy the selection and Ctrl + V to paste it into
our document. You can see that it looks yellow and a bit dark. We will
correct this in the next step.
Step 13
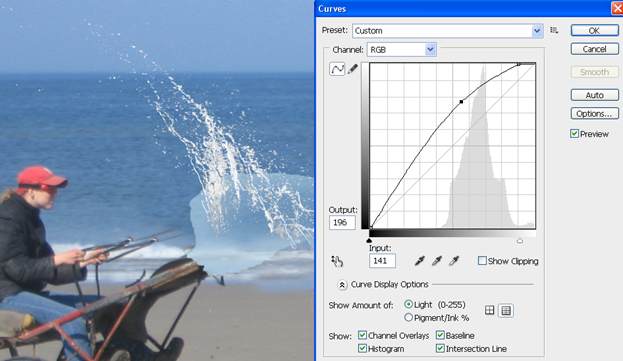
Press Ctrl + Shift + U to desaturate the splash. This will get rid of
the ugly yellow color. Still, the image look pretty gray. To increase
the luminosity and contrast let’s use a Curves Adjustment. We won’t use
adjustments layers for this because we will have a lot of water splashes
and the multitude of clipped adjustments layer will clutter the
document without offering a real advantage. I am all for non-destructive
editing and I usually use adjustment layers as much as possible but
sometimes a good old simple Curve will do just fine. So choose Image
> Adjustments > Curves and drag the curve upwards to increase the
lightness. Also drag the right slider a little towards the left to
increase contrast. You can see that the splash it is already looking
better.
Step 14
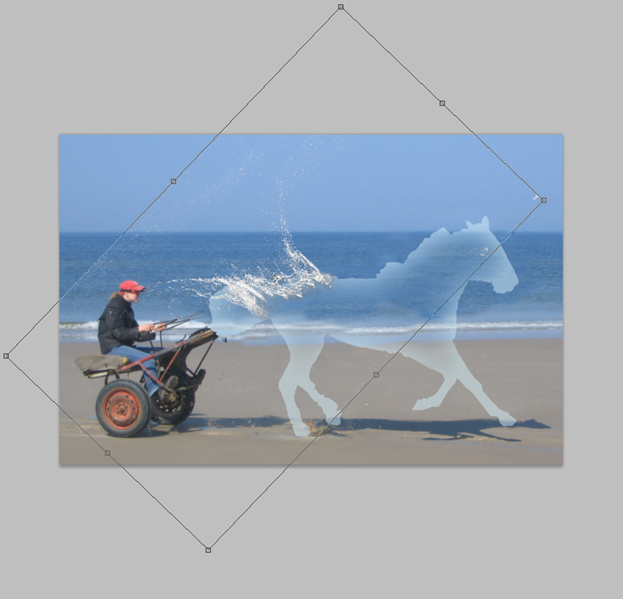
Now it’s time to position the water splash. Press Ctrl + T and rotate the splash to match the picture below and press Enter.
Step 15
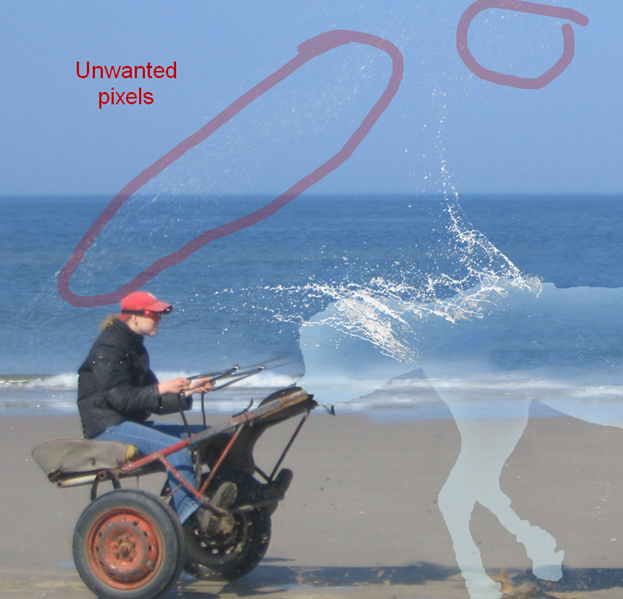
If you will take a closer look at the splash you will notice some
unwanted pixels from our Color Range selection. To get rid of them we
will use a layer mask.
Step 16
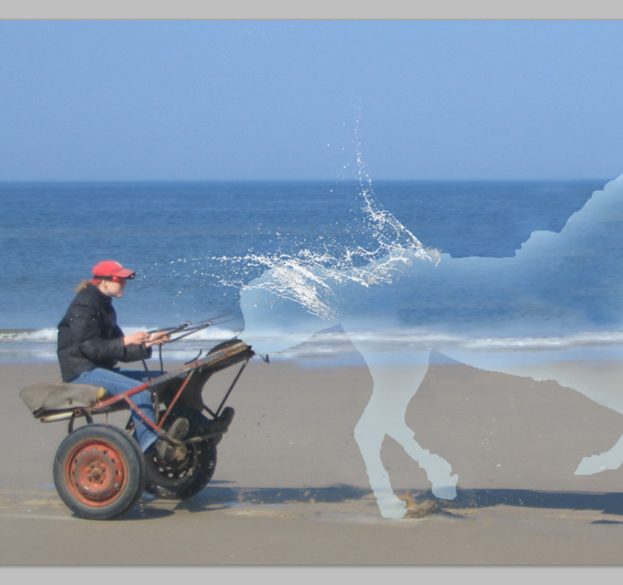
Choose Layer > Layer Mask > Reveal All to add a layer mask. I
strongly advise you to assign a keyboard shortcut to this very useful
command so you can have at you fingertips all the time. Choose a round
black soft brush tool and paint in the layer mask the highlighted areas
from above and any other unwanted residual pixels. Also if you have any
straight lines try to paint over them so the image doesn’t look fake.
Now the splash look nice and tidy.
Step 17
I will not repeat all the steps above for each water splash – this
will take a lot of useless writing. Instead I will only show you the
placement of each water splash. If you will follow the recipe from the
above steps you should be fine. To recap:
- Use Color Range to select the water splash.
- Paste the water splash into our document.
- Desaturate and apply a Curves adjustment to lighten it up.
- Position the splash using Free Transform (Ctrl + T).
- Use a layer mask to get rid of unwanted pixels or obvious lines.
Step 18
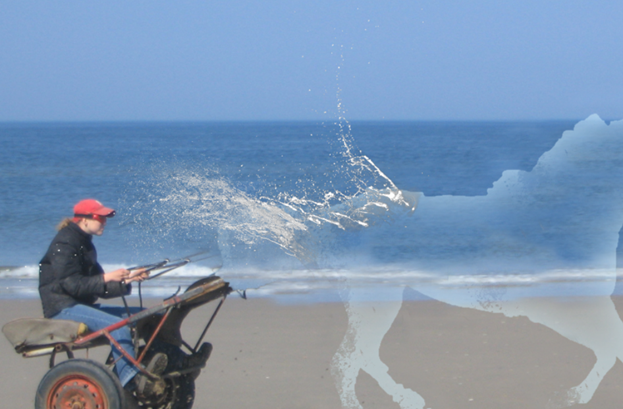
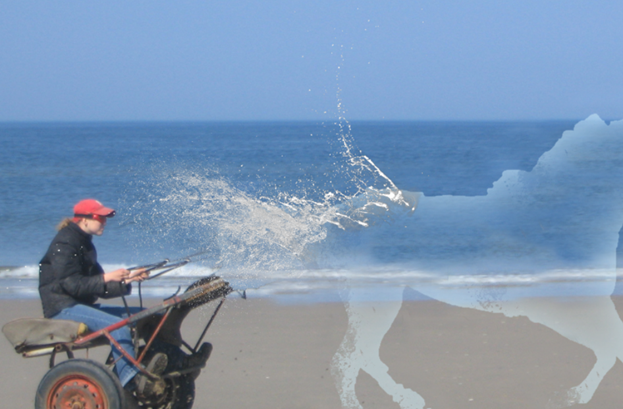
Let’s make the back of the horse. Place “Water Splash 3” like shown below
Step 19
Duplicate “Water Splash 3” layer by pressing Ctrl + J and move rotate it slightly to the left.
Step 20
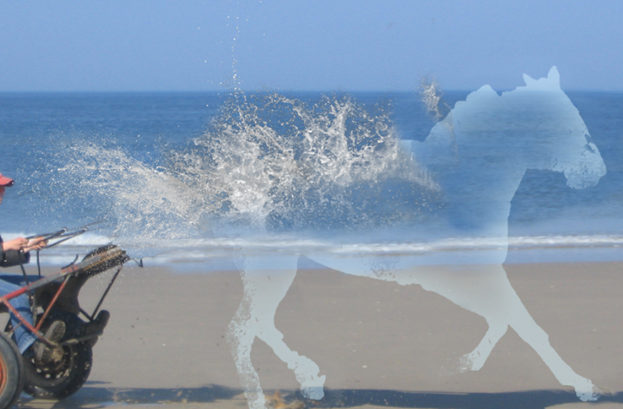
Place “Water Splash 4” on the back of the horse.
Step 21
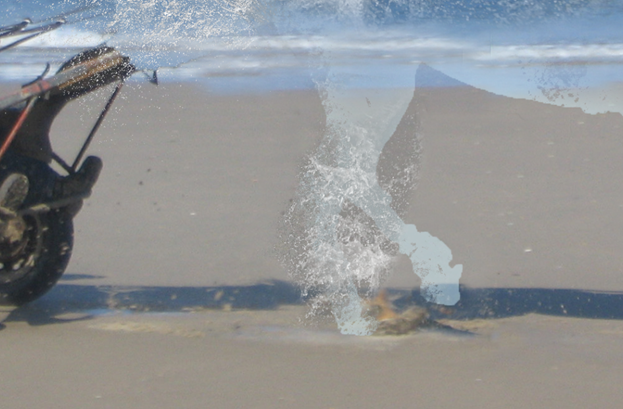
Duplicate “Water Splash 4” by pressing Ctrl + J and make it smaller. Place it on the back foot.
Step 22
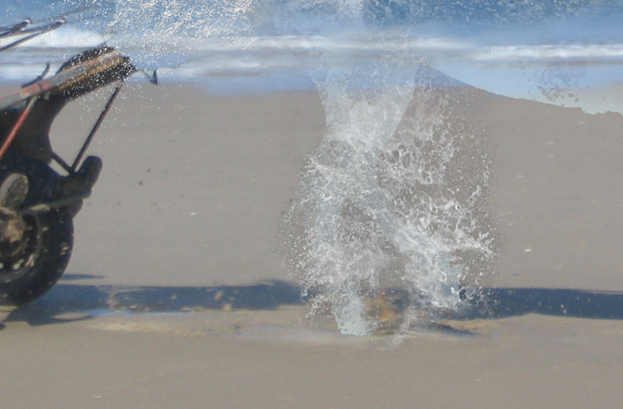
Duplicate the layer you just placed on the foot one more time and position it on the other foot.
Step 23
Duplicate on the foot layers and place it on the front foot.
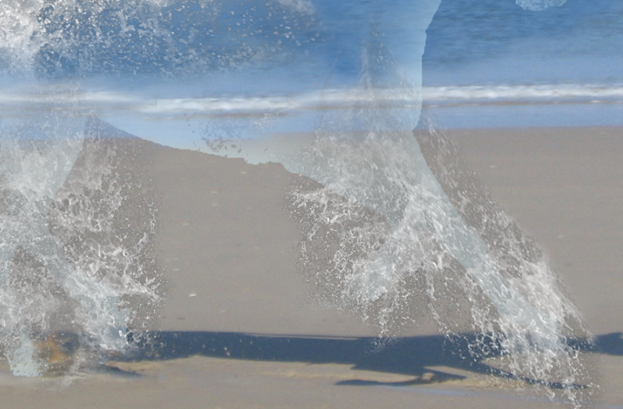
Step 24
For the elongated foot duplicate one of the water layers you used on
the feet but use Warp to stretch it a bit. Also make it a little bigger.
To use Warp with the Free Transform press Ctrl + T inside the box that
encompasses the layer and choose Warp.

Step 25
Place “Water Splash 5” on the chest of the horse with some water coming out from his mouth.

Step 26
“Water Splash 6” goes on the belly. Notice that this has a gray color
and it is not very bright. That’s because we need something to fill in
that big area and a very bright splash would be in conflict with all the
other splashes.
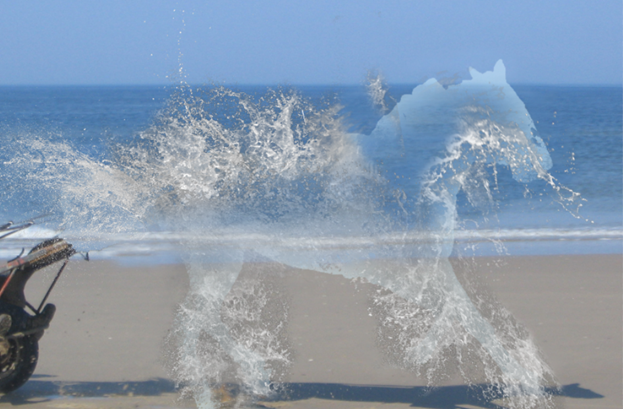
Step 27
“Water Splash 7” goes on the rear foot. It adds some nice random water drops
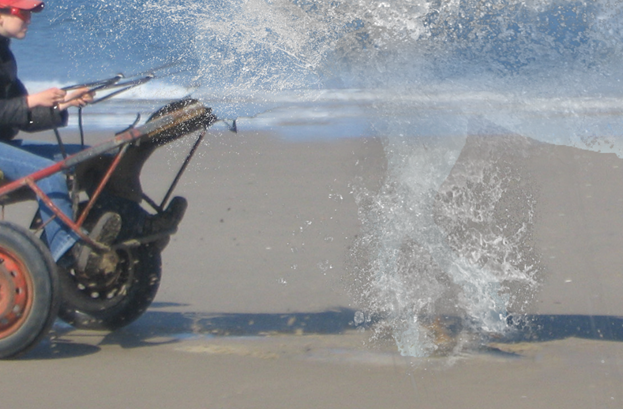
Step 28
“Water Splash 1” goes on the back and on the head
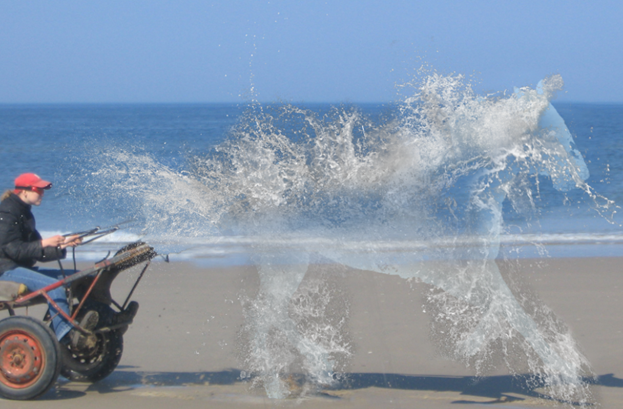
Step 29
Make a duplicate of “Water Splash 1” and use Warp to fit it on the head
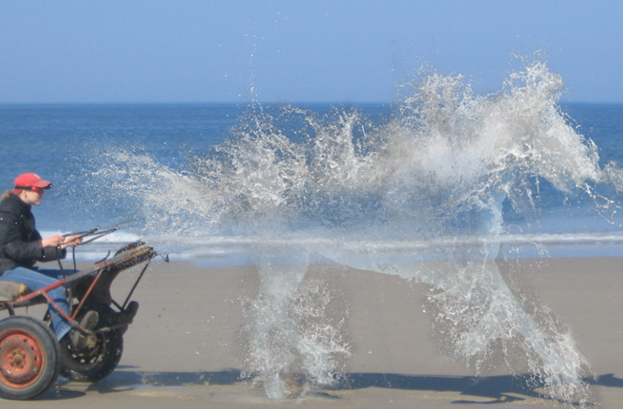
Step 30
Duplicate the original “Water Splash 1” again and place it somewhere
on the chest to fill in the gaps. It looks too bright so use a Curves
Adjustments to lower it’s brightness (drag the curve downwards).
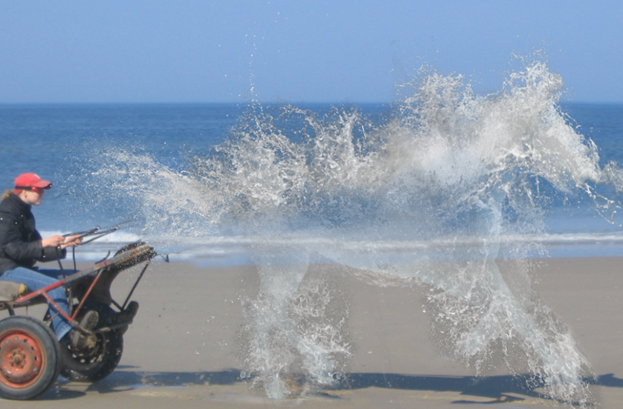
Step 31
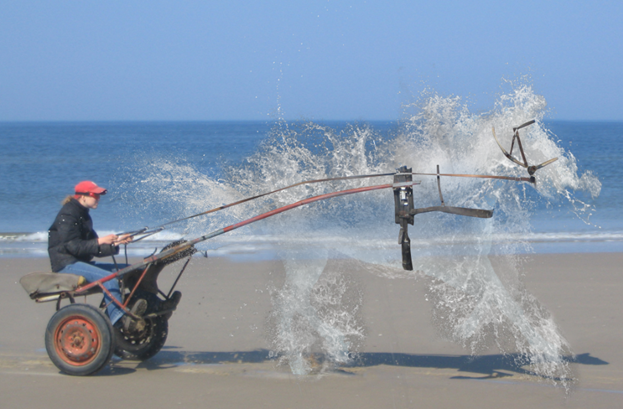
Now that the water horse it is done let’s put the original harness
over. To do this turn off all the layers except the original background
layer and using the pen tool select all the bigger parts of the gear
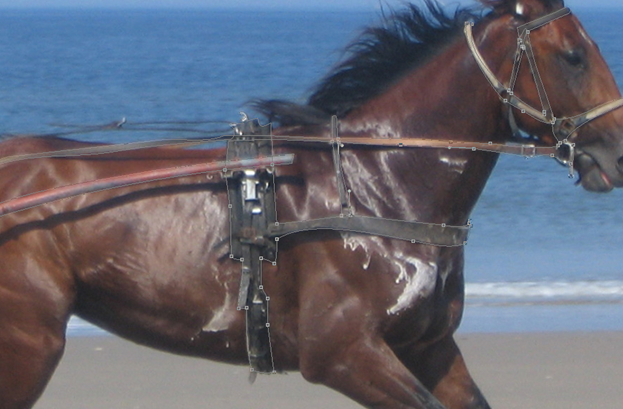
Step 32
After you’ve finished with paths press Ctrl + Enter to make selection
from path. Now press Ctrl + J to make a new layer from selection and
now you should have the harness on a new layer.
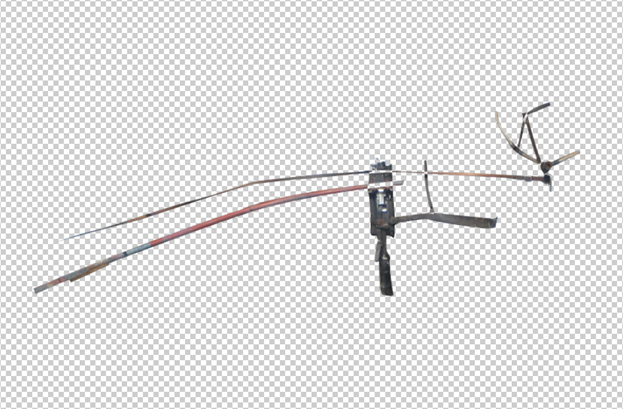
Step 33
Move the harness layer above all layers then turn back on the
visibility of all the layers. You should have something like the image
below. It looks pretty nice but it not quit complete yet. Because we can
see objects through water some of the harness on the other side of the
horse should be partially visible too. The problem is that we don’t know
how the back of the harness looks and we don’t have any photo reference
of the same harness. In these situations it is good to remember that
the elements in a photoshoped should look real but they don’t
necessarily have to be from a real reference. When you’re doing a scene
like that you’re selling an illusion so any tricks to make the illusion
look real will do.
Step 34
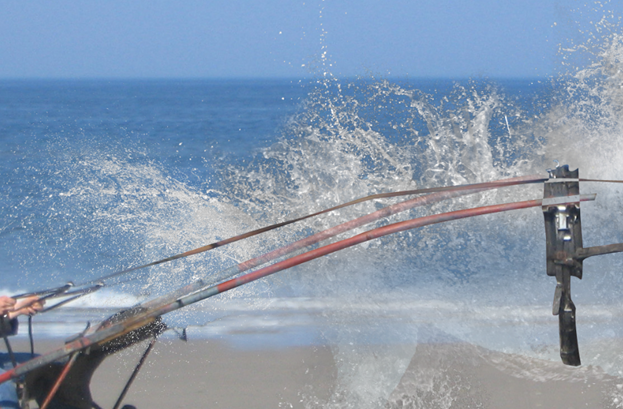
In this case the solution is to copy parts of the original harness on
new layers, resize them and lower the opacity (remember that we’re
viewing them through water). Make a selection of the desired part of the
harness ( like the red metallic bar) with the lasso tool and press Ctrl
+ J to make a new layer (just make sure that when you press Ctrl + J
you are on the original harness layer). Take a look at my results below.
Step 35
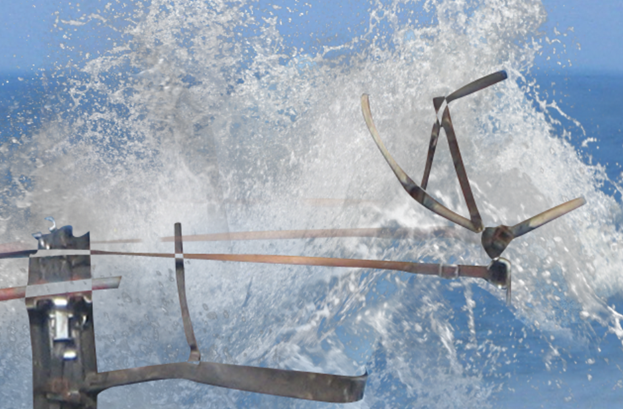
Repeat the step above with the long leather strip.
Step 36
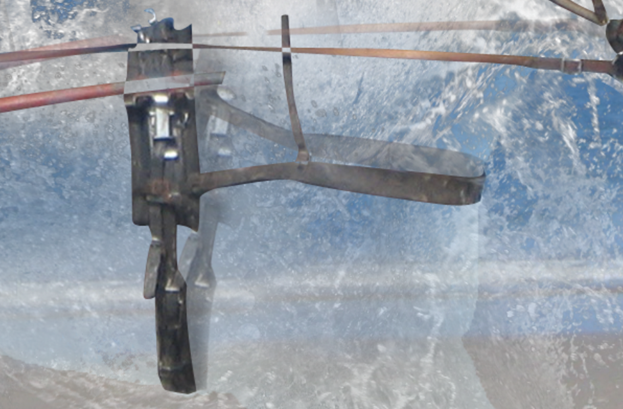
Do the same for the leather belt that goes below the belly and the one that goes across the chest.
Step 37
And repeat for the leather strips placed over the head. Of course you
can take your time and duplicate each and every crane and leather strip
but I think it looks pretty real already.
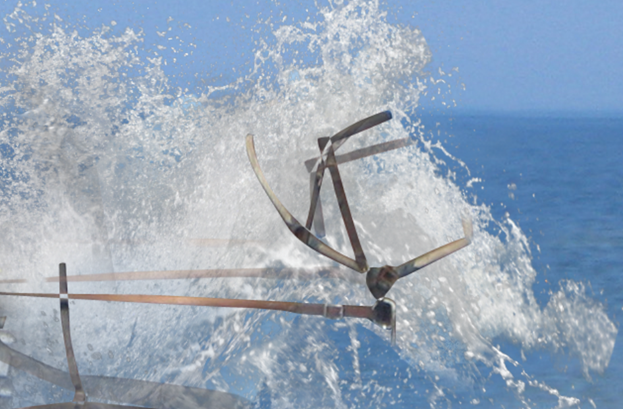
Step 38
Take a look at the shadow. Considering that this is a splashy water horse it looks very linear and tight to me.
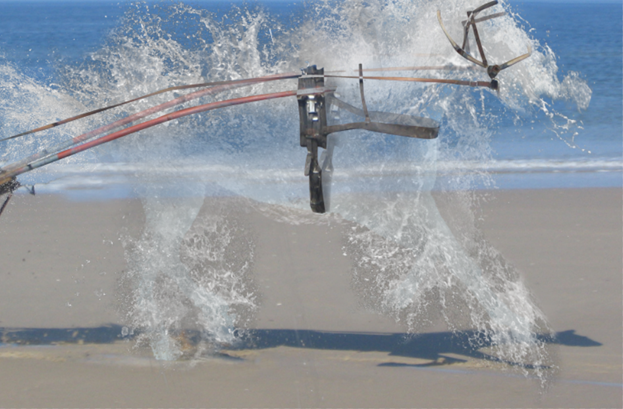
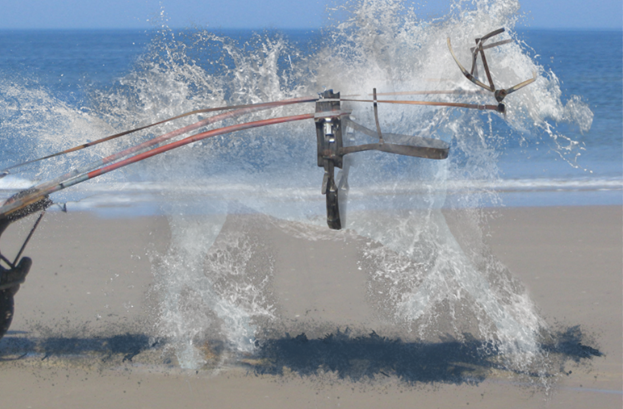
Step 39
Make a new layer (Ctrl + Shift + Alt + N) and using the standard
chalk brush tool and a splash brush (you can google splash brush –
you’ll find tons of them) with a color sampled from the original shadow
try to give it a more chaotic look.
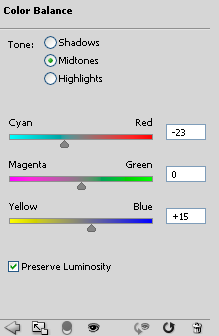
Step 40
Because this is a water related scene I thought that a Color Balance
Adjustment layer to shift the colors toward blue would be appropriate.
Step 41
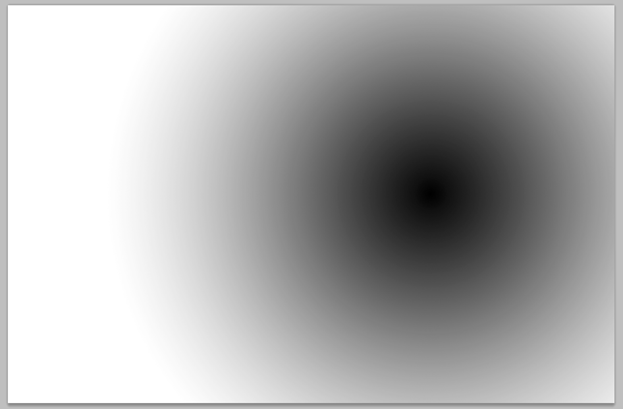
A little vignette effect to focus the attention on the horse would be
great too so let’s add a Curves Adjustment Layer and drag the curve
downwards to darken the image. Select the Gradient tool and from the
upper menu choose the Radial Gradient. Press D to set default colors and
in the Curves layer mask drag from the center towards the edges and
release. Here is how your layer mask should look.
Step 42
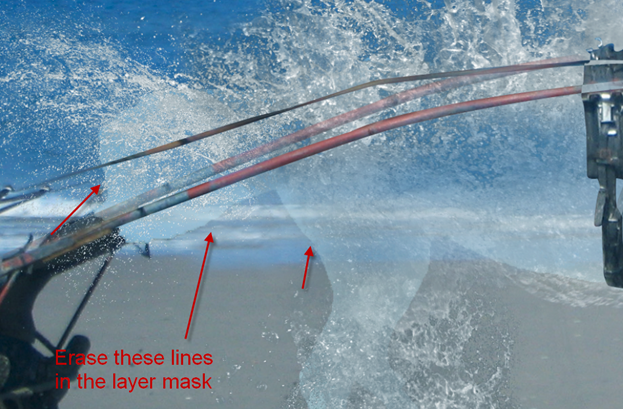
Notice how the blue outline of the horse – the Horse Glue layer we
created at step 9 – it is too visible. Go to the layer Horse Glue and
add a layer mask by choosing Layer > Layer Mask > Reveal all. With
a chalky brush erase the obvious straight lines – like the one around
the tail.
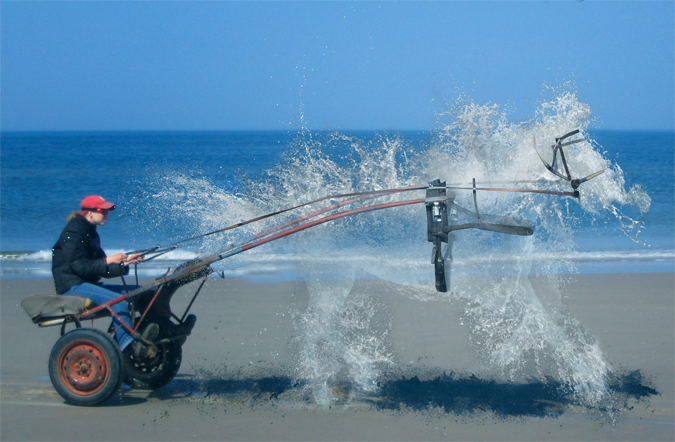
Final Results

 Admin
Admin


 Anonymous on

0 komentar:
Jangan Lupa Tinggalkan Pendapat Anda di Kotak Komen Ini Ya. ^_^